One of the most important concepts to understand when making shaders in Godot is coordinates.
Why do we need it?#
void fragment(){
    // This is the fragment function
}
I won’t explain fragment here. For that I’d suggest reading this article. The important thing to note is that it’s where we do most color related things, and even more important is that it runs on every pixel of your screen.

And if your shader is attached to a Node in Godot it’s basically just confined to that area.

What this means is that when we’re writing a fragment shader, we’re not manipulating a whole image at a time, but rather all the pixels using the same logic. We’re not saying “make this pixel here blue and that pixel red”, we’re asking “does this pixel meet the conditions to be blue”.
But for that we need different conditions in the first place. Otherwise all we could get is a single color.
void fragment(){
    COLOR = vec4(0.0,0.0,1.0,1.0); // Red = 0.0, Green = 0.0, Blue = 1.0, Alpha = 1.0
}
Coordinates are those conditions
Different Coordinates#
Coordinates like UV give us information on where the pixel actually is. There’s a few kinds of coordinates, but the important ones for us here are:
FRAGCOORDUVSCREEN_UV
FRAGCOORD#
It’s the position of the fragment on your screen. If you have a Full HD screen (1080, 1920) then the xy coordinates of FRAGCOORD on the pixel
in the middle of your screen would be (540, 960).
It’s also important to note that unlike the others, FRAGCOORD is has 4 values, so in addition to x and y, there’s also
z which is the depth and w which we will NOT get into here.
That’s because they don’t have the luxuries of a full game engine like Godot that does a bunch of stuff automatically for us behind the scenes.
UV#
UV on the other hand is a 2D coordinate ranging from (0.0, 0.0) to (1.0, 1.0). It is calculated from the vertices of your object. Since we’re working in 2D, vertices really just mean the corners
of our object.

If you’ve ever worked in 3D modeling you know of UV Mapping.
This is the same thing! These are the same UVs! So If you have a model with unwrapped UVs, that’s what you access by using UV.
So imagine the 2D object as just a 3D plane viewed directly (because that’s what it basically is)
Since our coordinates are just values and colors are just values it’s pretty common to see coordinates visualized like this:
void fragment() {
	COLOR = vec4(UV,0.0,1.0); // Red = UV.x, Green = UV.y, Blue = 0.0, Alpha = 1.0
}
SCREEN_UV#
Now similar to UV, SCREEN_UV is also a 2D coordinate ranging from (0.0, 0.0) to (1.0, 1.0), but in the case of SCREEN_UV it’s for the whole screen.

If our object was to cover the whole screen, like a full screen ColorRect for example, the visualization would look like this:
void fragment() {
	COLOR = vec4(SCREEN_UV,0.0,1.0); // Red = SCREEN_UV.x, Green = SCREEN_UV.y, Blue = 0.0, Alpha = 1.0
}
But since our object isn’t covering the whole screen we can only see what’s covered by the object

What are they ACTUALLY used for#
Coordinates open up a bunch of possibilities for us. One simple thing is using them to generate shapes directly
Shapes#
We can use UV.x to generate a nice gradient for example:
void fragment() {
    float gradient = UV.x;
	COLOR.rgb = vec3(gradient); // Red = gradient, Green = gradient, Blue = gradient
}
And because we know that UV.x ranges from 0.0 to 1.0, we can even flip the gradient by subtracting it from 1.0:
void fragment() {
    float gradient = 1.0 - UV.x;
	COLOR.rgb = vec3(gradient); // Red = gradient, Green = gradient, Blue = gradient
}
Sampling Textures#
In game engines like Godot, one of the most important uses for UVs is sampling textures.
Like we discussed earlier, in shaders you don’t just say “This object has a texture”, because we’re manipulating pixels and not the whole image. Now of course using a full game engine like Godot gives us the luxury of simply dragging a texture into a texture slot and all the other stuff happens behind the scenes
But we’re writing shaders… this IS the “behind the scenes”.
Until now I’ve only shown parts of a shader, but for this example we need a full shader:
shader_type canvas_item; // 2D shaders are canvas_items

// uniform is a variable you can see in the editor
// sampler2D means it's a texture
uniform sampler2D our_texture;

void fragment() {
    vec4 color = texture(our_texture, UV); // Sample our texture at the current UV
    COLOR = color; // Assign the color to the pixel
}
Important part here is texture(our_texture, UV). What it does is sample our given texture at the given UV coordinate.
The function is saying “Hey I’m here at UV coordinate such and such, could you tell me what our_texture looks like here”,
And in response we get the color at that coordinate.
So essentially if UV is (0.0, 0.0) at that pixel, it will sample the top-left-most position on the texture.
And if UV is (1.0, 1.0), it will sample the bottom-right-most position on the texture.
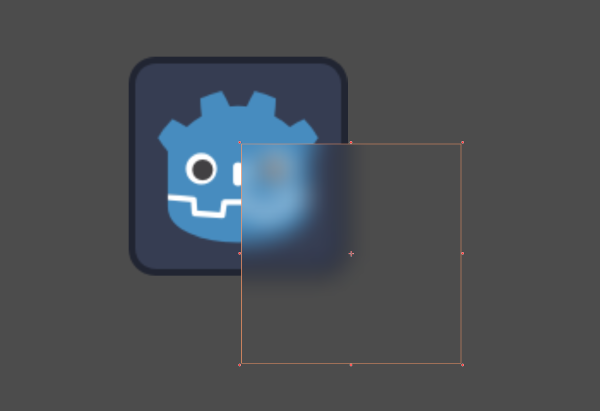
If we instead used SCREEN_UV in place of UV, we’d only see part of our texture:
void fragment() {
    vec4 color = texture(our_texture, SCREEN_UV); // Sample our texture at the current SCREEN_UV
    COLOR = color; // Assign the color to the pixel
}
Because in reality SCREEN_UV starts from the top-left part of the screen and extends all the way to the bottom-right
while our node really covers just a part of that

What next#
In the next part we’ll cover some ways to manipulate UV’s to your liking. Things like scaling, rotating and such.