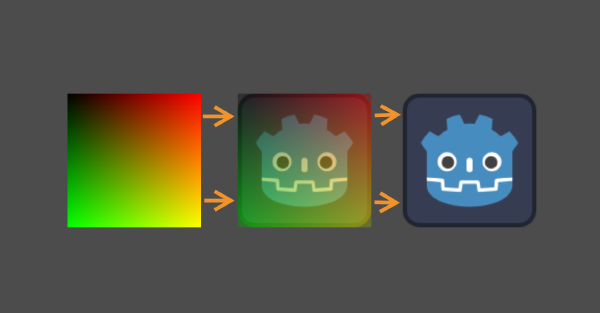
In the first part we covered the basics of coordinates, we even wrote this simple shader (which we’ll use in this part):
shader_type canvas_item; // 2D shaders are canvas_items
// uniform is a variable you can see in the editor
// sampler2D means it's a texture
uniform sampler2D our_texture;
void fragment() {
vec4 color = texture(our_texture, UV); // Sample our texture at the current UV
COLOR = color; // Assign the color to the pixel
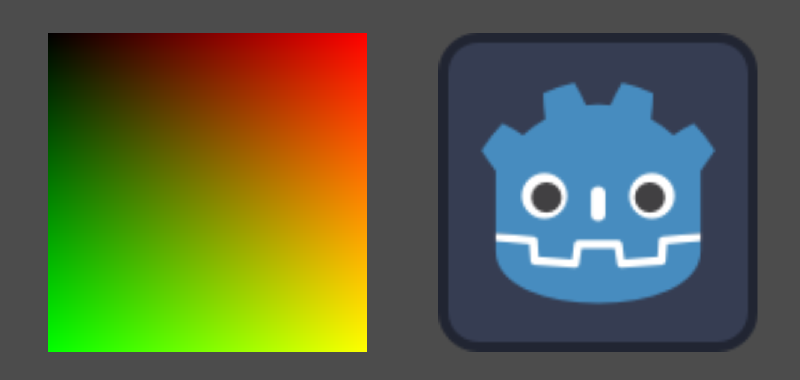
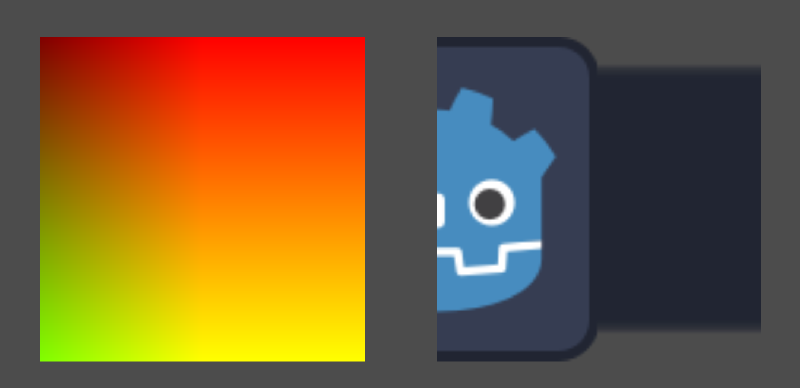
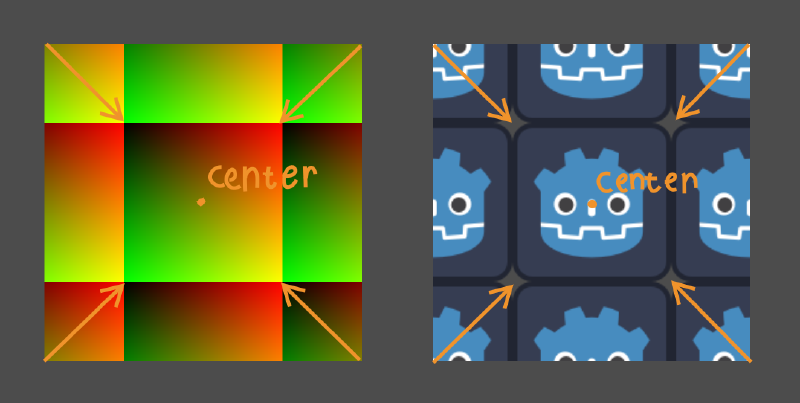
}Going forward in this tutorial all the images will show UV on the left and the final colors on the right like this:
Moving#
First of all to make things clearer we’ll seperate UV into its own variable
void fragment() {
vec2 uv = UV; // Assign UV to our own uv value for easier manipulation
vec4 color = texture(our_texture, uv);
COLOR = color;
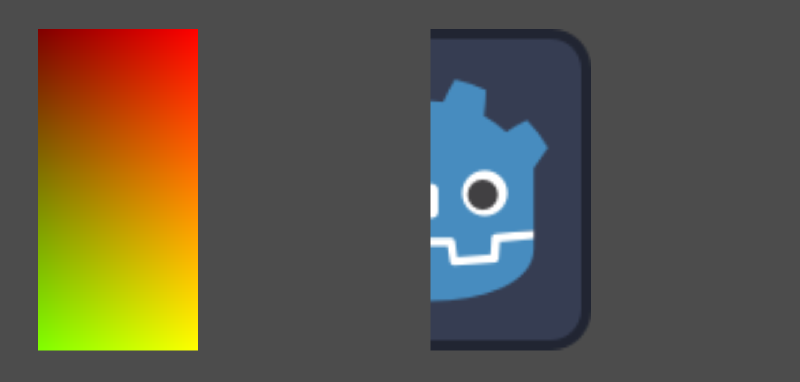
}Unlike with Nodes in GDScript, there is no position we can assign values to. Instead we have to offset UV.
This is pretty simple though (or is it? (foreshadowing?)). You just add your offset to it.
void fragment() {
    vec2 uv = UV;
    uv.x += 0.5;

    vec4 color = texture(our_texture, uv);
    COLOR = color;
}
Problems#
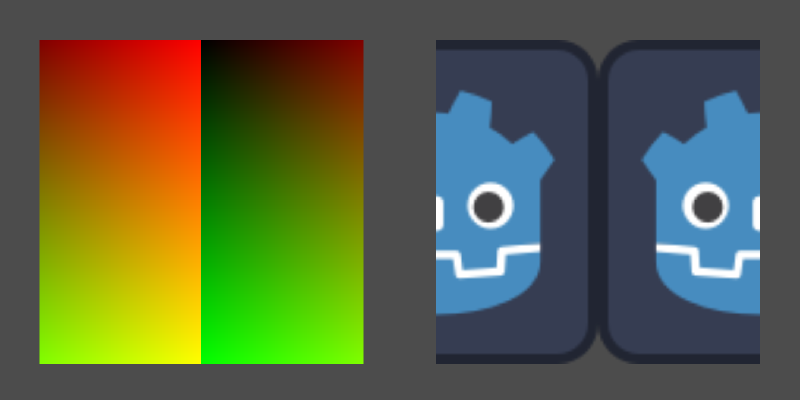
Of course it isn’t actually that simple. A few things happen here:
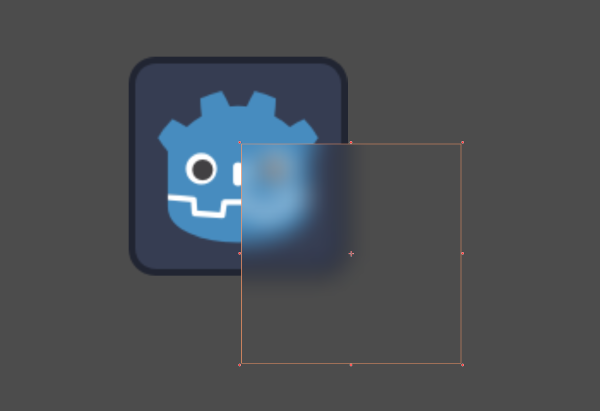
- Since we’re still limited to the area of our Node, we can’t move the texture outside of that area. For that you’ll have to just move the Node itself
- Adding
0.5will offset the texture, but because the texture expectsUV.xto only range from0.0to1.0, the parts whereUV.xis above1.0after our addition (eg. the right half) will simply use the color that’s at the edge of the texture
We can solve our problem in a few ways though
Solution 1: Discarding pixels#
If we simply don’t want there to be anything beyond our moved texture, we can use discard the pixels
void fragment() {
    vec2 uv = UV;
    uv.x += 0.5;
    if(uv.x > 1.0){
        discard;
    }

    vec4 color = texture(our_texture, uv);
    COLOR = color;
}
This is visually equivalent of making the pixel transparent by setting COLOR.a (The alpha channel) to 0.0,
which might be more performant (but the difference is negligent in our situation).
void fragment() {
vec2 uv = UV;
uv.x += 0.5;
vec4 color = texture(our_texture, uv);
COLOR = color;
if(uv.x > 1.0){
COLOR.a = 0.0;
}
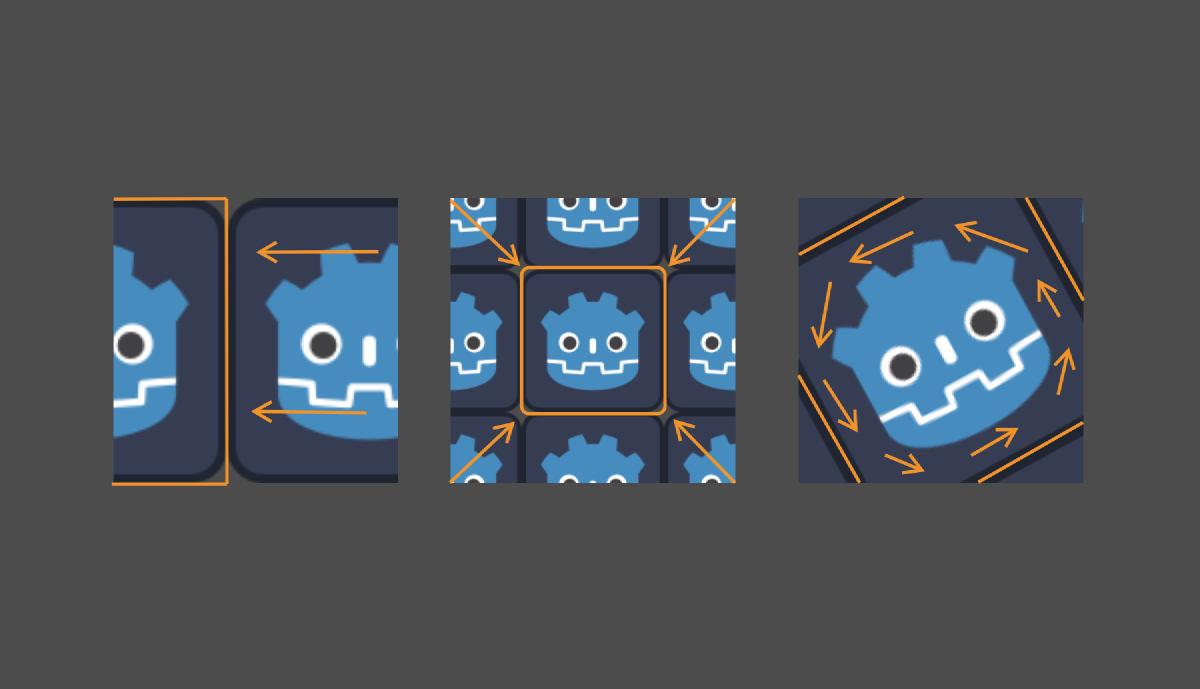
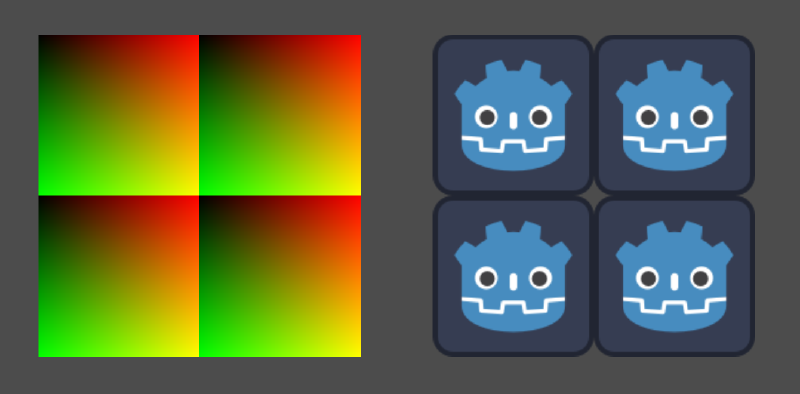
}Solution 2: Tiling#
We can also tile the texture by basically wrapping the UV value using the modulo operation.
void fragment() {
    vec2 uv = UV;
    uv.x += 0.5;
    uv = mod(uv, 1.0);

    vec4 color = texture(our_texture, uv);
    COLOR = color;
}
Scaling#
Like with moving we can scale our UV value. You can do that with multiplication.
One thing to remember is that we are not scaling the texture itself, but rather the coordinates with which the texture is sampled.
This means that when you’re multiplying UV by 2.0 you’re not making the texture twice as big, but rather the coordinates from which its sampled.
In short: Multiplying by 2.0 makes the texture twice as small.
void fragment() {
    vec2 uv = UV;
    uv *= 2.0;
    uv = mod(uv, 1.0);

    vec4 color = texture(our_texture, uv);
    COLOR = color;
}
Scaling around a point#
Scaling by multiplying will scale the UV around the point where UV is (0.0, 0.0). By default that’s the top left.
To change the point around which we scale, we have to first offset the UVs, then scale, then offset them back.
void fragment() {
    vec2 uv = UV;
    vec2 center = vec2(0.5);

    uv += center;
    uv *= 2.0;
    uv -= center;

    uv = mod(uv, 1.0);

    vec4 color = texture(our_texture, uv);
    COLOR = color;
}
Reusable scaling function#
To make things clean and reusable we can move the scaling to its own function
vec2 scale(vec2 uv, vec2 center, vec2 amount) {
    uv -= center;
    uv *= amount;
    uv += center;
    return uv;
}

void fragment() {
    vec2 uv = UV;

    uv = scale(uv, vec2(0.5), vec2(0.5))

    uv = mod(uv, 1.0);

    vec4 color = texture(our_texture, uv);
    COLOR = color;
}Rotation#
For rotation we’ll write a rotation function where we can use what we learned with scaling to rotate around whichever point we want.
vec2 rotate(vec2 uv, vec2 center, float angle){
    uv -= center;

    float s = sin(angle);
    float c = cos(angle);

    uv = vec2(
        uv.x * c - uv.y * s,
        uv.x * s + uv.y * c
    );

    uv += center;
    return uv
}
I don’t want to explain how that works because otherwise I would just ramble on about sine and cosine and would never finish this guide. Just know it works.
This function expects radians for the angle
Pi radians is equal to 180 degrees. Also you don’t have to write the whole 3.14159… and so on you can just use PI.
PI / 2.0 would be 90 degrees.
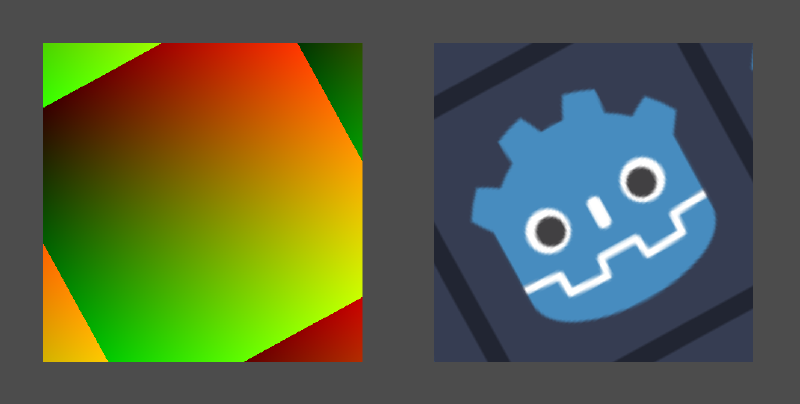
Anyways if we then use our rotate() function in the fragment shader we can rotate our texture like this!
void fragment() {
	vec2 uv = UV;

	uv = rotate(uv, vec2(0.5), 0.5);

	uv = mod(uv, 1.0);

    vec4 color = texture(our_texture, uv);
    COLOR = color;
}
What’s next?#
Next up we’ll look at generating our own shapes with only UV and a little math